Saab 9-5 2008 Bi-Xenon to OEM+ LED
Lähetetty: Ti Loka 09, 2018 15:41
Terve kaikille heikoista valoista kärsiville! Olen jo pitkään seurannut foorumia mutta tässä ensimmäinen postaus.
Ajattelin kirjoittaa tämän projektikuvauksen englanniksi jotta myös tällä foorumilla ja muissa maissa olevat ei Suomen kieliset Saabistit pystyvät tarvittaessa hyötymään tästä.
Background:
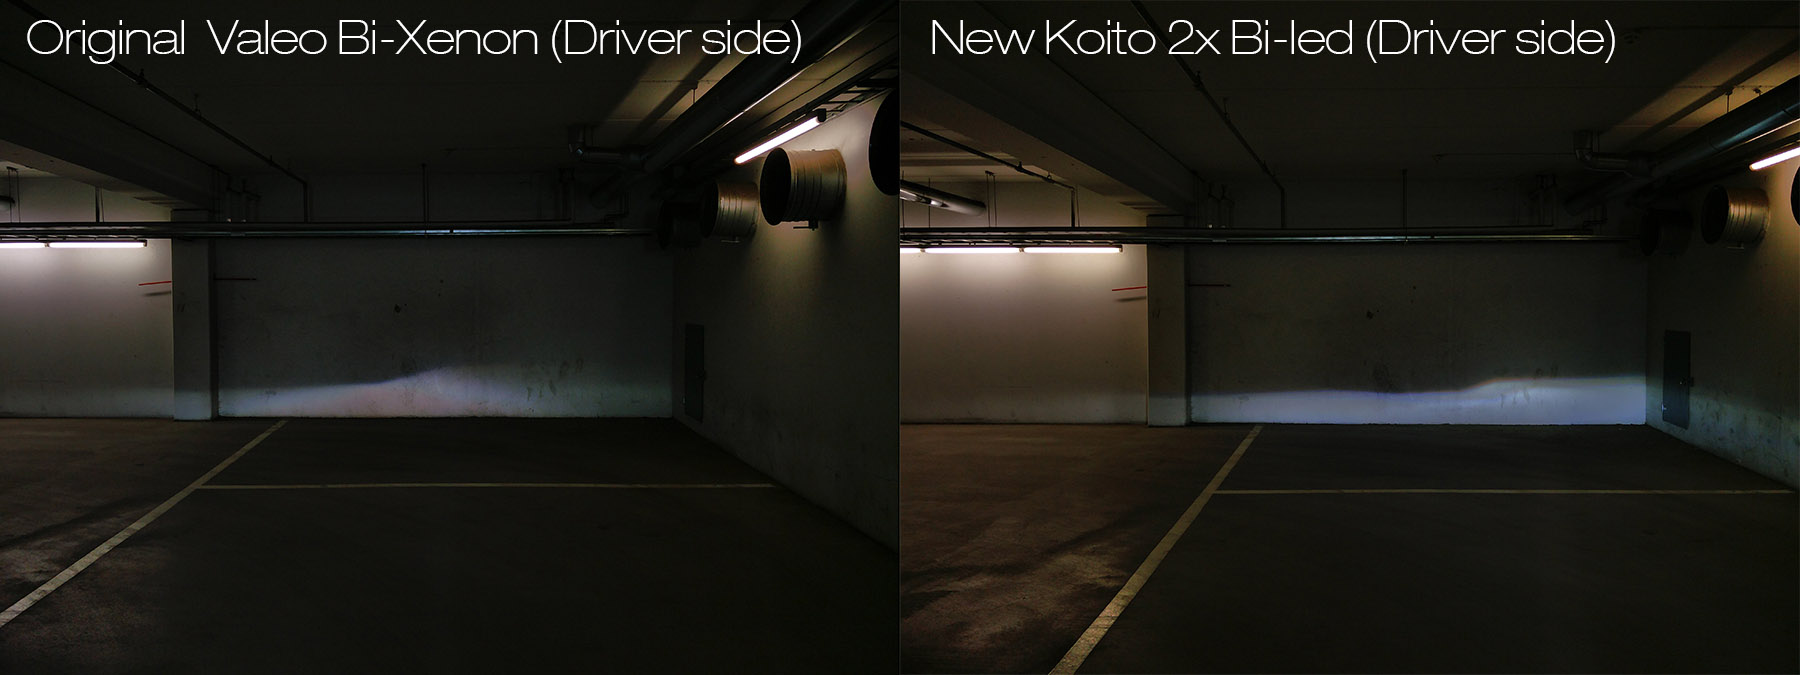
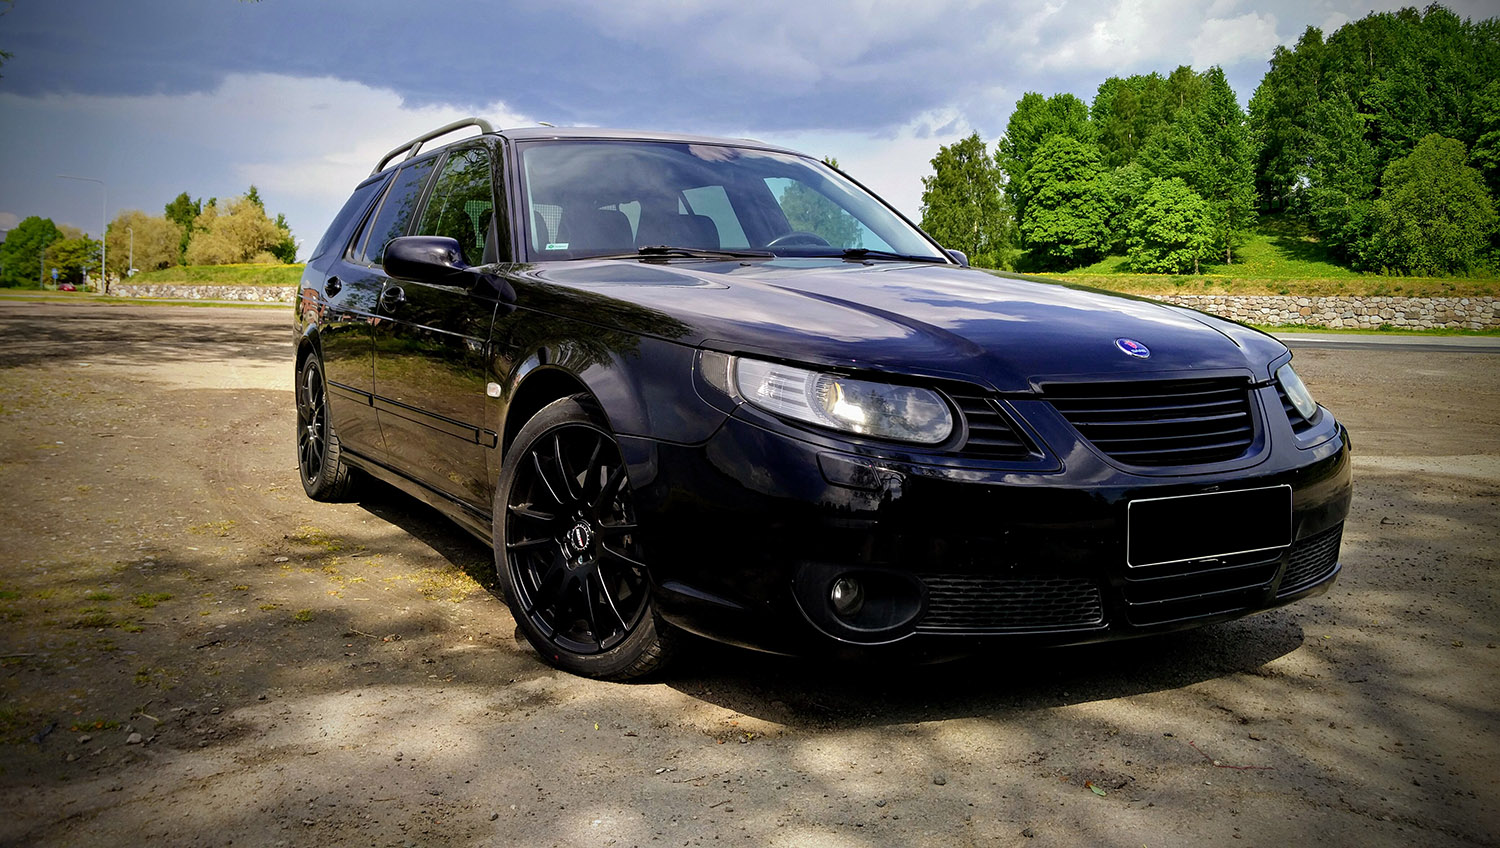
Bought a 2008 9-5 Aero from Sweden last year. The car came with the Valeo Bi-Xenon headlights with the H7 extra high beam. As the car is doing a lot of highway miles I got very quickly fed up with the poor light output of the original Valeo bi-xenon units. I wanted to improve the light output significantly while making sure anything I install would be as close to the OEM as possible, fully functional automatic height adjustment, without dazzling on coming cars as well as passing the yearly inspection without having to change the headlight assemblies.
Solution:
Install 2x Koito OEM Bi-Led projects in each headlight assembly. These are OEM LED projectors used in bunch of different cars since 2015. The beauty of them is that everything is self-contained including the LED driver and they have been designed to be used in sealed headlight housings.

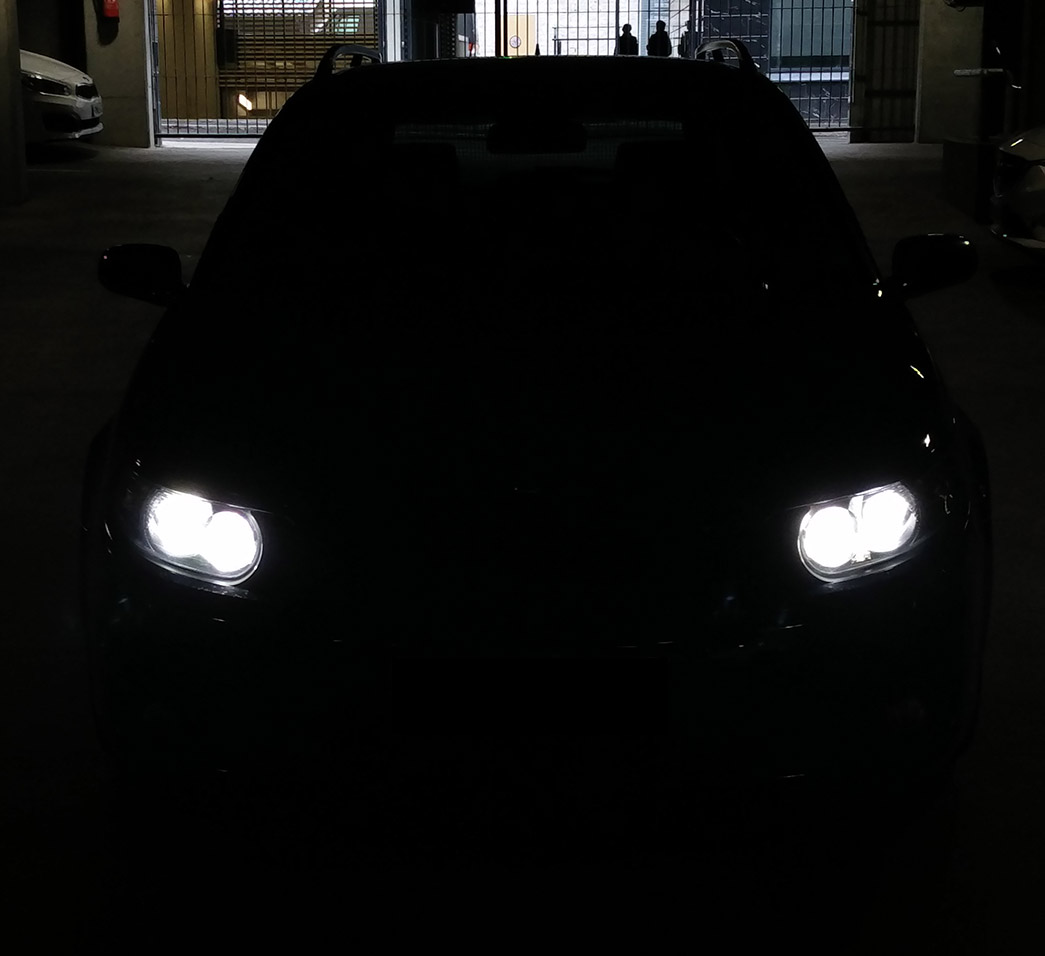
Result:

Needed parts:
- 4x Koito Bi-led units (Selfcontained OEM LED projector used in various car models including Toyotas and Subarus)
- 2x second hand bi-xenon headlight assemblies (I bought them from the UK for very cheap as the internals will be discarded anyway, so doesn't matter if they are LHD or RHD)
- Wire
- 2x On/Off switch
- Sheet of PP plastic
- Butyl sealant strip (e.g. Morimoto retro rubber)
Needed equipment:
- 3D printer (I used Creality CR-10s)
- Filament (I used Taulmann T-glase PETG because of its properties)
- Soldering iron (For soldering and plastic welding)
- Prying tools (Sharp angled icepicks seem to work the best, like O-Ring tools)
- A lot of patience when opening the pesky permasealed headlight assemblies
How-to:
As this project has been more of a R&D project than anything else, a full write-up would be rather exhausting read. Hence, I thought I'd skip some of the details and give the overview. Any further questions send me a private message.
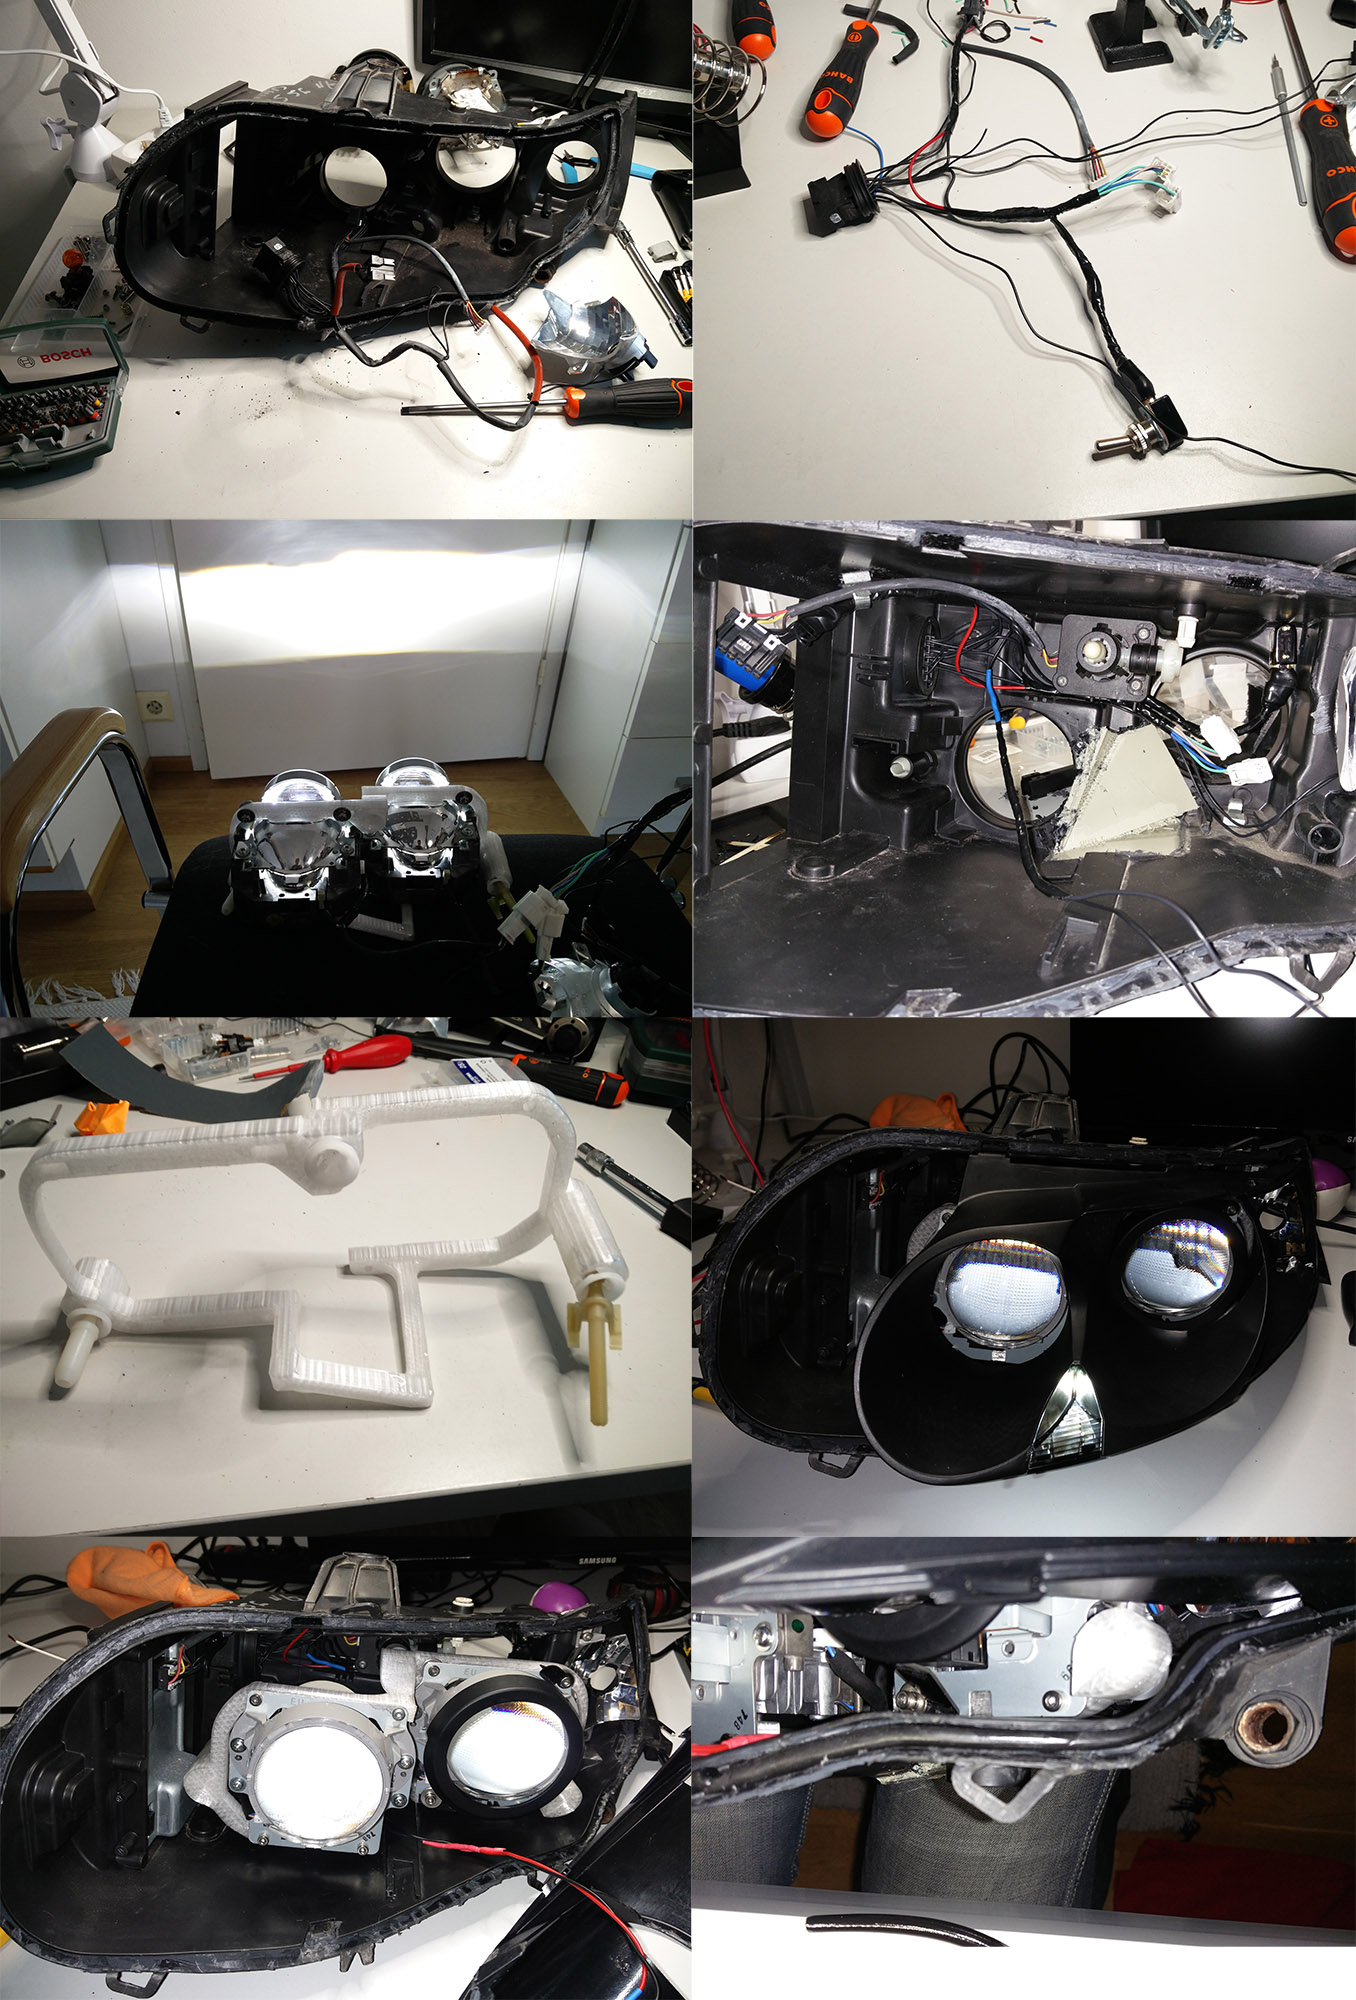
1. Disassembly
One word, permaseal.. It induces sweat, anxiety and strong words for solid couple of hours when prying the original headlight assemblies apart. The glass (or plastic) is permasealed to the headlight assembly meaning even if you put the assembly into the oven the sealant doesn't get soft. The method I used with the assemblies is that you put the assembly into the oven at 140C for approximately 7 minutes. Then slowly deform the the edges around the glass so that you can get a 90degree icepick into the groove where the sealant is and start pulling it apart. The key is to do this very slowly and carefully so that you don't break the assembly or the glass.


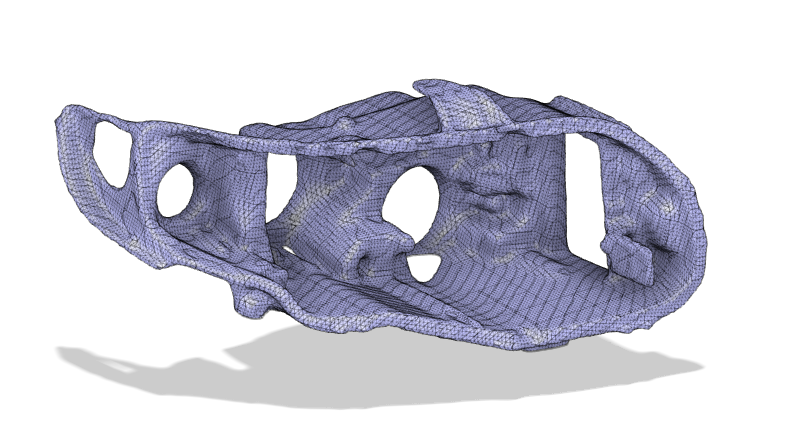
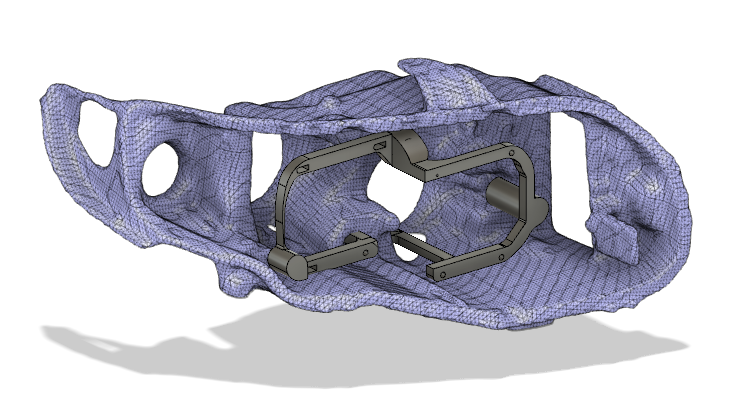
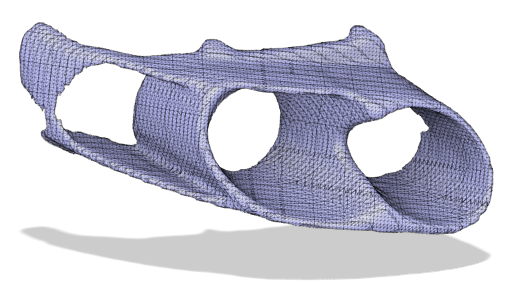
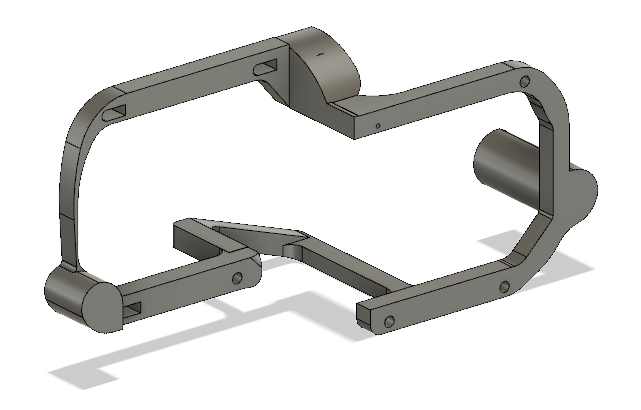
2. Design
In order to get the projectors pointing at the right angle, mount the new projector frame into the original mounting points so that the automatic leveling can be used and to make sure everything fits in place, I ended up 3D scanning the headlight assemblies as well as the projectors. This made it very simple to do the design and modeling in 3D CAD for the OEM+ fit and finish. If anyone would like to get some of the models, the headlight assemblies, the shield, the projector or the final frame. I am happy to open source my designs for the community so anyone can recreate and improve these designs.
3. Fabrication
As the design was done in 3D CAD, the next logical step was to fabricate the part using a 3D printer. After doing bunch of high and low temperature testing including printing test pieces, putting them into the oven and freezer at various temperatures I settled on Taulmann T-Glase PETG. In order to increase the strength even further I heated some of the most critical spots with soldering iron to make sure the 3D printed layers adhere well enough. In addition to this I used plastic adhering epoxy and a single layer of fiber glass in the places where most of the strain is put i.e. the mounting locations and the middle of the frame. As for the strength and durability of the material, I've using the headlights for about 20000km with Finland having some of the highest summer temperatures so around +35C and the 3D printed part has held up without any deformation or problems. Even when riding on extremely bumpy gravel roads.

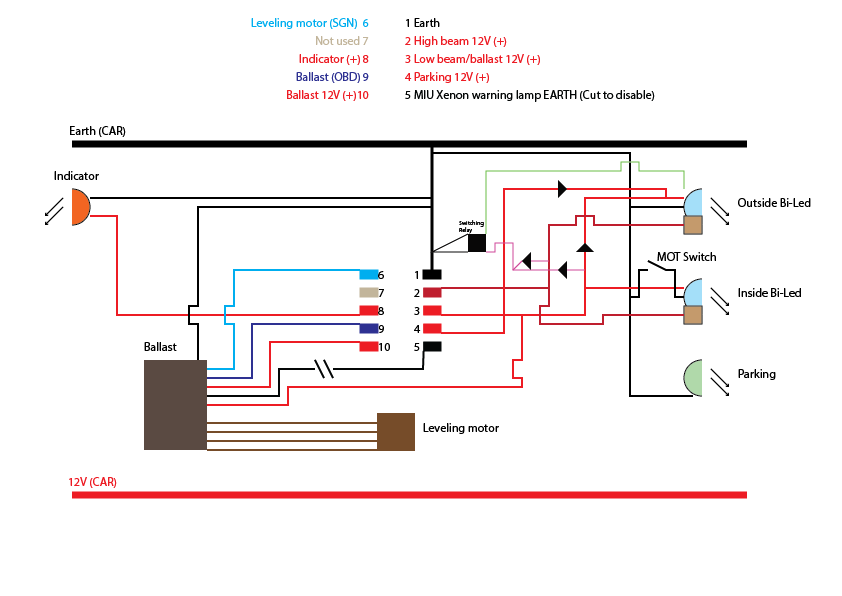
4.Wiring
The Koito bi-led units are extremely simple to wire. They come as two variants, one where by grounding a wire they have a dimmer DRL mode in which case the original parking lights can be disabled completely. If however you get the units that are missing the DRL feature you will need to install a parking light using the original wiring. For the parking lights I used good quality diffused Philips LED bulb and fabricated a holder where the bulb itself is hidden making it look very OEM+. As for the other wiring, it is mostly very straight forward. Below is a wiring diagram, the wiring diagram is for the more complicated version where the bi-led units have the DRL feature. Because the headlight leveling system is built into the original Valeo ballast, the ballast will have to stay in place, the original xenon bulb and it's igniter just taken out. As the ballast performs a bulb check and the original xenon bulb has been removed the MIL light for the headlight auto leveling will light on the dash. To prevent this from happening, the wire going from pin 5 to the Valeo ballast needs to be cut, this prevents the MIL lamp from being grounded. I have also developed a more advanced solution with arduino nano where the bus traffic between the ballast and the car is intercepted and the specific fault code for the bulb warning is discarded and all OK is sent back to the car. The MOT switch in the wiring diagram is just to turn off the other projector for the yearly inspection to make the headlights look like the original ones.
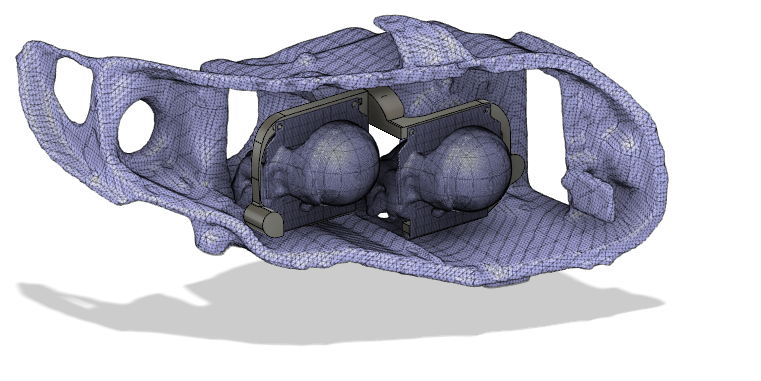
5. Assembly
The final assembly is very straightforward procedure. The headlight assembly needs to cut slight between the two round holes in order to make room for the new frame and the LED modules. I rebuilt the middle piece by cutting straight pieces from PP plastic sheet and plastic welding them on the assembly. For the frame, I detached the original white ball mounting pieces Valeo has used in the original frame. This makes it simple as pushing the frame in and it will lock into the original place and the automatic headlight leveling will work as it is supposed to. After the frame has been fitted with the projectors and mounted into the headlight assembly with wiring plugged in and everything tested. Fill the channel around the assembly with the butyl sealant, put the headlight in the oven according to the spec from the butyl manufacturer and push the glass in place. The entire final assembly takes around couple of hours to do.
There you have it! OEM+!
Ajattelin kirjoittaa tämän projektikuvauksen englanniksi jotta myös tällä foorumilla ja muissa maissa olevat ei Suomen kieliset Saabistit pystyvät tarvittaessa hyötymään tästä.
Background:
Bought a 2008 9-5 Aero from Sweden last year. The car came with the Valeo Bi-Xenon headlights with the H7 extra high beam. As the car is doing a lot of highway miles I got very quickly fed up with the poor light output of the original Valeo bi-xenon units. I wanted to improve the light output significantly while making sure anything I install would be as close to the OEM as possible, fully functional automatic height adjustment, without dazzling on coming cars as well as passing the yearly inspection without having to change the headlight assemblies.
Solution:
Install 2x Koito OEM Bi-Led projects in each headlight assembly. These are OEM LED projectors used in bunch of different cars since 2015. The beauty of them is that everything is self-contained including the LED driver and they have been designed to be used in sealed headlight housings.
Result:
Needed parts:
- 4x Koito Bi-led units (Selfcontained OEM LED projector used in various car models including Toyotas and Subarus)
- 2x second hand bi-xenon headlight assemblies (I bought them from the UK for very cheap as the internals will be discarded anyway, so doesn't matter if they are LHD or RHD)
- Wire
- 2x On/Off switch
- Sheet of PP plastic
- Butyl sealant strip (e.g. Morimoto retro rubber)
Needed equipment:
- 3D printer (I used Creality CR-10s)
- Filament (I used Taulmann T-glase PETG because of its properties)
- Soldering iron (For soldering and plastic welding)
- Prying tools (Sharp angled icepicks seem to work the best, like O-Ring tools)
- A lot of patience when opening the pesky permasealed headlight assemblies
How-to:
As this project has been more of a R&D project than anything else, a full write-up would be rather exhausting read. Hence, I thought I'd skip some of the details and give the overview. Any further questions send me a private message.
1. Disassembly
One word, permaseal.. It induces sweat, anxiety and strong words for solid couple of hours when prying the original headlight assemblies apart. The glass (or plastic) is permasealed to the headlight assembly meaning even if you put the assembly into the oven the sealant doesn't get soft. The method I used with the assemblies is that you put the assembly into the oven at 140C for approximately 7 minutes. Then slowly deform the the edges around the glass so that you can get a 90degree icepick into the groove where the sealant is and start pulling it apart. The key is to do this very slowly and carefully so that you don't break the assembly or the glass.
2. Design
In order to get the projectors pointing at the right angle, mount the new projector frame into the original mounting points so that the automatic leveling can be used and to make sure everything fits in place, I ended up 3D scanning the headlight assemblies as well as the projectors. This made it very simple to do the design and modeling in 3D CAD for the OEM+ fit and finish. If anyone would like to get some of the models, the headlight assemblies, the shield, the projector or the final frame. I am happy to open source my designs for the community so anyone can recreate and improve these designs.
3. Fabrication
As the design was done in 3D CAD, the next logical step was to fabricate the part using a 3D printer. After doing bunch of high and low temperature testing including printing test pieces, putting them into the oven and freezer at various temperatures I settled on Taulmann T-Glase PETG. In order to increase the strength even further I heated some of the most critical spots with soldering iron to make sure the 3D printed layers adhere well enough. In addition to this I used plastic adhering epoxy and a single layer of fiber glass in the places where most of the strain is put i.e. the mounting locations and the middle of the frame. As for the strength and durability of the material, I've using the headlights for about 20000km with Finland having some of the highest summer temperatures so around +35C and the 3D printed part has held up without any deformation or problems. Even when riding on extremely bumpy gravel roads.
4.Wiring
The Koito bi-led units are extremely simple to wire. They come as two variants, one where by grounding a wire they have a dimmer DRL mode in which case the original parking lights can be disabled completely. If however you get the units that are missing the DRL feature you will need to install a parking light using the original wiring. For the parking lights I used good quality diffused Philips LED bulb and fabricated a holder where the bulb itself is hidden making it look very OEM+. As for the other wiring, it is mostly very straight forward. Below is a wiring diagram, the wiring diagram is for the more complicated version where the bi-led units have the DRL feature. Because the headlight leveling system is built into the original Valeo ballast, the ballast will have to stay in place, the original xenon bulb and it's igniter just taken out. As the ballast performs a bulb check and the original xenon bulb has been removed the MIL light for the headlight auto leveling will light on the dash. To prevent this from happening, the wire going from pin 5 to the Valeo ballast needs to be cut, this prevents the MIL lamp from being grounded. I have also developed a more advanced solution with arduino nano where the bus traffic between the ballast and the car is intercepted and the specific fault code for the bulb warning is discarded and all OK is sent back to the car. The MOT switch in the wiring diagram is just to turn off the other projector for the yearly inspection to make the headlights look like the original ones.
5. Assembly
The final assembly is very straightforward procedure. The headlight assembly needs to cut slight between the two round holes in order to make room for the new frame and the LED modules. I rebuilt the middle piece by cutting straight pieces from PP plastic sheet and plastic welding them on the assembly. For the frame, I detached the original white ball mounting pieces Valeo has used in the original frame. This makes it simple as pushing the frame in and it will lock into the original place and the automatic headlight leveling will work as it is supposed to. After the frame has been fitted with the projectors and mounted into the headlight assembly with wiring plugged in and everything tested. Fill the channel around the assembly with the butyl sealant, put the headlight in the oven according to the spec from the butyl manufacturer and push the glass in place. The entire final assembly takes around couple of hours to do.
There you have it! OEM+!